The last few days saw the installation of the garage door; the completion of the eaves and fascia metal; and the hanging of outdoor lighting fixtures. Also all appliance installation and the final plumbing work, the installation of two toilets.
Internal painting continues, as done the final cabinetry work as the fridge/freezer and the dishwasher will have cabinet wood fronts.
Move-in is scheduled for Oct 22!!
Note the starburst "dingbat" -- the name given to such elements on mid-century modern houses and apartments. Ours lights up at night. Also the roof's "wings" are now fully finished in the brown metal.
The new light fitting in the porch was sourced in Palm Springs and is in a style often seen on mid-century modern houses.
The garage door -- powder coated in the orangey color that was also used in the porch.
Wednesday, October 7, 2009
Saturday, September 5, 2009
Slowly but surely
Nine weeks since the last post which has friends and relatives rightly complaining as they want to know what is happening. No excuses but a lot of distractions related to both getting this house completed and listing our current house. So we have not been pushing our contractor as much as we might, as we want to continue to show the current house furnished as long as possible. Plus we kept forgetting to take the camera when we go up to the new house, which is 40 mins away.
So a quick list of what has been happening:
All external hardscape finished including the patio area outside the slider wall and the floating steps up to the front entrance.
All cabinets installed and stained on site.
All sinks installed in kitchen, laundry room and bathrooms.
A 12' x 6' deck which webuilt, using Trex, outside the Master Bedroom.
Most of the fascia and eaves metal (in dark chocolate brown) has been installed.
Rough landscaping of the garden areas and the front and back parkways -- the latter owned by the city but which we will be landscaping with low water plantings to replace the weed-ridden grass that was there.
Examples of the custom cabinetry with its Espresso stain.
The in-hall linen closet.
A niche at the end of the hall for displaying various "objects." Also that's one of the three operable (using a remote) skylights
The living room fireplace which has a gas built-in. Note the concrete floors which be cleaned and sealed shortly.
The next two weeks will see both painters and electricians in at various times and the arrival of our garage door. This is the same "orangey" color as the porch and we had to send the first shipment back as the powder coated finish had been scratched.
Sunday, June 21, 2009
Final windows going in, plus cabinetry has arrived
If you looked closely at the end view photo in the Fencing post you will have noted the rectangular clerestory window frames at the end of the house. The triangular shaped frames, at each end of the house, were also installed in the last two weeks.
Also note the cabinet boxes in that last shot, part of the custom cabinetry delivery, some of which is now installed in the kitchen. The rest, for the hallway and bathrooms, will wait until after painting.
Fencing
The nature of our lot means 400' of fencing and we had considered lots of options to try and keep the cost down and have no, or low, maintenance. We finally settled for HardiePlank, a cement board product normally used for siding, which cost around 30% of the lowest cost wood options. So, even allowing for the fact that it needs more of a framework, because it's thinner and more flexible than wood, it meant considerable savings.
Note that the Hardie folks do not endorse it used this way but you see the larger sheets of HardieBoard used in many ways on fences in Venice, CA and it's very durable as many of those fences have not been painted.
We had the builder's guys build the framework, which P then spent 3 days painting with a solid stain. Then P, along with a good friend and another helper, spent another 3 days hanging the boards. As you can see, these are hung horizontal and the design optimizes their 12' lengths whenever possible, plus the fact you can purchase a range of widths.
The planks come primed on one side and we elected to hang that side inside with a view to painting the outside. However, we have come to like the look, especially as the evenly spaced 6.25" planks have a different tone. So we now plan to use a clear masonary sealer.
This photo also shows one of the six /\ shaped setbacks in the fence where will plant stuff in front.
A view from the end with the triangle capped off, a code requirement to ensure traffic sightlines where the streets meet. In fact we set it back further than needed and plan to put a small tree in front of the external side.
An elevated interior view of the garden, showing the framework.
Friday, May 8, 2009
Lots of activity on internal & external wall surfaces
Thursday, April 30, 2009
Solar Panels are Installed
The selected vendor, SolarCity, installed the 4.5 KW system, which is sized to supply all of our electrical needs -- building up credit in sunny times, that we will then use in those less sunny times.
Given this is our "last house," the math on the investment was easy, particularly as the rebates -- an immediate 24% back from the local utility and then a further 30% tax rebate at the end of the year -- basically halve the price.
Mounting racks are set up
Panels are prepared
Then mounted
Panels are angled at just 5% for aesthetic reasons, so they cannot be seen from the street -- resulting in a slight reduction in efficiency. Also the boxy item is one of three skylights, its sill raised to ensure the panels are not seen when looking up,
Saturday, April 18, 2009
Now the house is really green!
A Tyvek-type house wrap, chosen by our builder because of its breathable and "self-healing" properties, in that if penetrated accidentally, the hole self-heals.
So, externally, the stucco guys are next, but they will wait until the interior wall board is hung next week, so there is no risk of wall vibration while the stucco sets.
Also, bathrooms are now being tiled and the site prepared for the hardscape elements -- patio, barbecue area, fountain pad and fire pit pad.
Sunday, April 5, 2009
The final roof goes on
Using a product that mainly been used in commercial applications but is now being used on residential for it's low maintenance, long life and cooler roof attributes. The thermoplastic membrane is laid on top of fireproof decking that is part of the process.
"The Duro-Last flashings and deck sheets are custom prefabricated, which makes for easy installation. Approximately 80-85% of the roof seaming is completed in a controlled factory environment at one of the Duro-Last plants, ensuring high product quality. In addition, there are no hazardous chemicals, vapors or messy kettles to deal with during installation."
This product also ensures watertight sealing around those many solar panel legs.
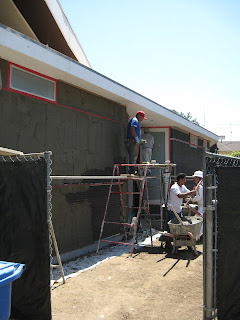
Now wall boarding can start this week and the stucco guys have already started preparing the exterior walls.
"The Duro-Last flashings and deck sheets are custom prefabricated, which makes for easy installation. Approximately 80-85% of the roof seaming is completed in a controlled factory environment at one of the Duro-Last plants, ensuring high product quality. In addition, there are no hazardous chemicals, vapors or messy kettles to deal with during installation."
http://www.duro-last.com/generalContent/residential.asp
This product also ensures watertight sealing around those many solar panel legs.
Now wall boarding can start this week and the stucco guys have already started preparing the exterior walls.
Saturday, March 14, 2009
Doors now installed
The four panels -- two fixed and two sliding -- in the living room.
The front pivot-style door, and matching window in the porch that brings light into inner hallway at one end of the kitchen -- both using milk glass. Note the door rail/handle that seems to float in the glass.
Door from the kitchen into the rear garden. Space above is for the triangular shaped clerestory windows.
Next photos show the detailed work necessary before drywall can be hung. The first is the living room ceiling showing lights, speaker enclosures and the sprinklers -- the latter a Culver City requirement (costing $10,000!) for new construction.
The freestanding wall between the kitchen and dining space, with an opening cut more for the view. J wanted to ensure that is not a serving hatch, so it will not even have a shelf! Note the amount of wiring running through the walls.
Even the smaller details get attention, like the mailbox (naturally in the same metal finish as the windows) and the cat door in the TV room.
Saturday, February 21, 2009
Lot's of activity, much of it internal
10+ weeks since the last post, partly because of the holidays but also waiting for more "photo opportunities" that would show progress. The obvious lesson learned here is that building sites do not always provide "good" photo opps and one needs to show whatever is happening, such as the clutter of the wood scaffold system shown in this photo, which was built to allow access to, and completion of, the clerestories and eaves.
This view is through the kitchen/dining room wall, which will have an 8' wide opening. Note the gas fire is now installed on the right side.
The other most visual sign of progress is the beginning of window installation -- double glazed with aluminum frames -- along with three skylights in the internal hallway. All windows having a screened operable 18" high section at the top to facilitate ventilation. The windows in the clerestories, along with glass doors (main entry and one each out of the kitchen and master bedroom) are now being built as their measurements were not taken until framing was complete.
This photo also showing the gutter system which will be invisible when the eaves are finished, drainage happening through pipes embedded in the walls. The fascia and eaves were closed in this week and will now be faced with a colored metal.
Other activities in this period were:
- Concrete work to create the new driveway apron as close off the old one, as we reversed the house frontage -- which also included new sidewalk sections.
- Most electrical work, so all in-ceiling lights now in, ready for wallboard, along with in-ceiling speakers in the living room. Also all outlets and switches.
- The necessary plumbing before wallboard.
We also spent a lot of time "locking down" such elements as the the kitchen layout, the garage door (including picking a color for powder coating,) the entry way steps and the tile layouts.
The "official" timeline has seven more weeks and our builder feels that we should make it in about nine. We shall see.
Friday, December 5, 2008
Roofing Starts
The central flat section is fully covered by the first layer of plywood, temporarily covered with plastic. This view of the entry, with the "front door" being on the right.
A large support beam, for the sloped sections over the living/dining space, goes up next. The rafters are then run from the steel, across that beam, down to the flat roof.
The emerging triangular space between the roof line and top pf the wall is where clerestory windows will go. That single piece of wood, taking the slope further out, shows the the depth of the planned roof overhang (or eaves.)
Thursday, November 13, 2008
Interior Walls and Roof Beams
Friday, October 31, 2008
The walls start to go up
The first wall is the "burnished" block "feature wall." It, along with the steel framework on the other two sides, will support the clerestory windows in a the sloped roof.
The rest of the external walls are SIPs (structurally engineered panels) a sandwich of strandboard and foam insulation. Note the the pre-drilled runs for electrics etc.
The 9' 6" high SIPs are mounted on 2 x 4 floor plates, nailed along those edges, and then vertically connected with a 4" wide "bridge SIP" which is screwed through on each edge. The tops are then connected horizontally with bridging 2 x 4's. The SIPS are also sequenced to allow a 2 x 4 insert in the vertical edge wherever an internal wall will run 90 degrees from it. Window openings will be cut in later.
Note the floor plates for the internal walls, which will be conventional 2 x 4 framing, as that allows easier access for most of the plumbing.
Saturday, October 11, 2008
Radiant Heating Install and Slab Pour
Subscribe to:
Posts (Atom)